Having a smartphone in your pocket has really changed the game for artists! You no longer need to carry a big DSLR around your neck and read a thousand-page manual on how to operate it properly before you can take reference photos.
I can hear you shouting through the screen “Yes, but I’m still not happy with my reference photos”
You still need to know how to get the most out of your equipment. I’m not talking about spending the next 6 months learning every tiny detail about how to become a professional-level photographer. I’m talking about some quick wins. Some simple changes, some easy improvements, and a few nuggets of knowledge to add to your repertoire.
Here’s our crash course on taking better smartphone photos. We focus on iPhones, as they are the most popular. That being said, 90% of this post still applies to you if you don’t have an iPhone. We’ve broken it down into sections to turn it into manageable chunks… You might want to try out each nugget of information as you’re reading this post.
Fortunately, you’re almost certainly familiar with a lot of this theory, but it’s still good to skim over it and make ssee what tips you can pick up.
What & Why
I think this is the best place to start. It’s the concrete foundations that allow you to lay the first bricks of your painting through to the final lick of paint. If you don’t consider these things first, you’ll never feel like your painting is actually finished. I’m sure you’ve stood there and looked at a painting and you immediately understood the story that the painter was trying to tell. That’s what we’re looking for!
What are you taking a photo of? Sure, you found a nice flower or a nice house… But what’s nice about it? What compels you to want to paint it? Was it the contrast between the highlights and shadows? The improbable way in which a poppy is growing out of the side of a stone wall? The story that the building told? You need to try and understand these elements and then include them into your photos.
You need to make sure that you capture the What as well as the Why. You don’t have to do it all in one photo. You can take several photos and combine them! Remember, your biggest advantage is your artistic license. You can add a bird in the sky after the fact, or you can add a beautiful flower that you saw 100 yards down the road. Think of your prospective painting as a collection/collage of several moments that you saw throughout the day.
Composition
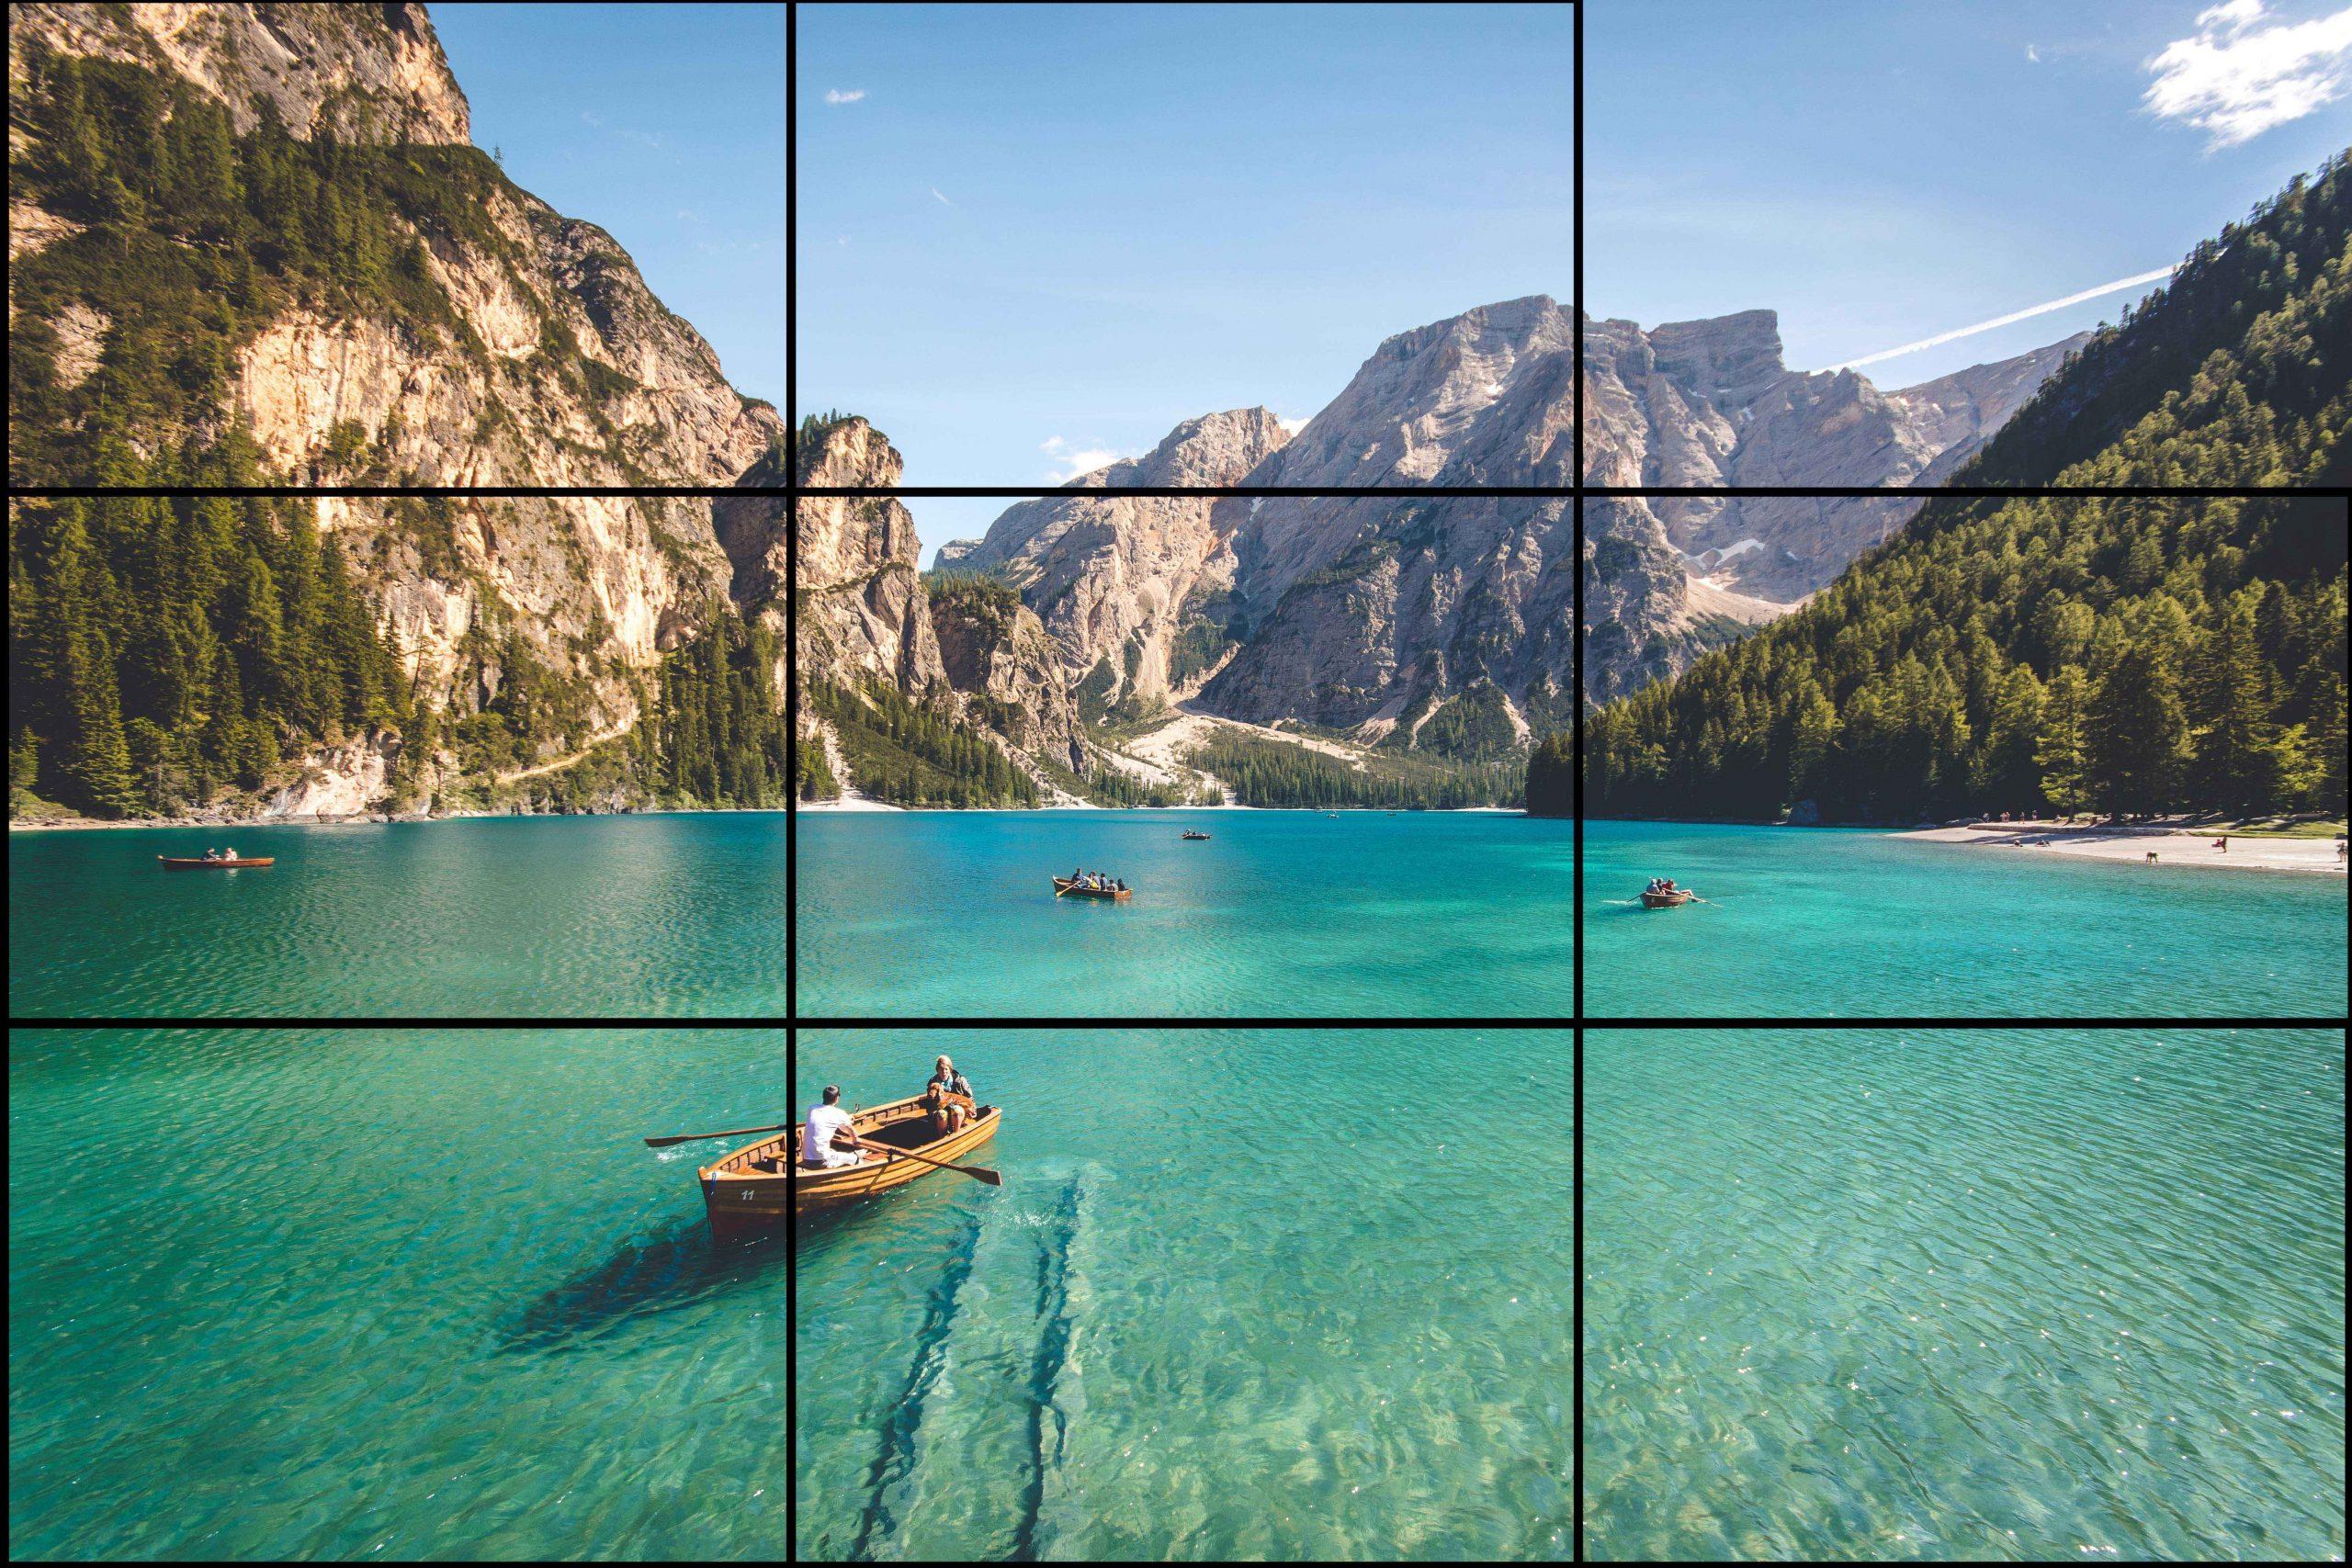
I’m sure that you already know about the rule of thirds… You can apply it in the same way you apply it to your reference photos. In fact, if you can apply the rule of thirds properly when taking a photo, it’s going to make your painting much easier!
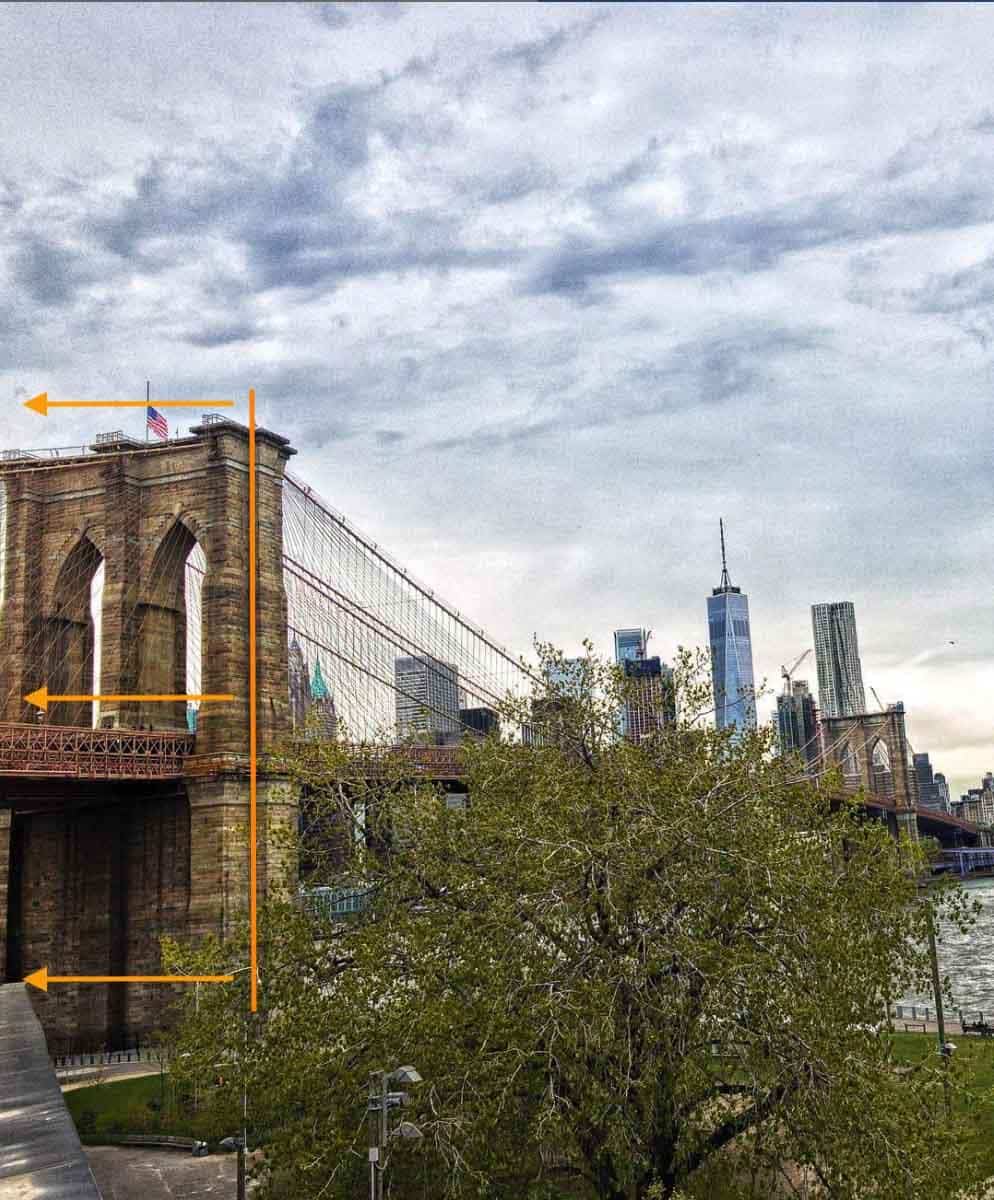
Another thing to take into consideration is straight lines on buildings. Make sure that if you’ve got the edge of the building in your photo, it’s in a straight line (see the image below).
Take your foreground and background into consideration. Of course, some people like to use their artistic license to add or remove things from their reference photo, but if you want to paint from something more realistic, then take your foreground and background into consideration.
For example, think about changing the angle you take the photo from in order to include some flowers in the foreground. Also, you could consider moving to another angle to get some of the sunset in the background of your photo or to include more or less of the building behind.
I was listening to the amazing Richard Claremont give a short lesson to his students before a morning visit to La Roque Gageac & he was talking about 7 different compositional types. It wouldn’t be fair of me to share all 7, but I’m sure he wouldn’t mind me sharing one or two. (If you want the rest, reach out to him on Instagram or take his composition mastery course here!)
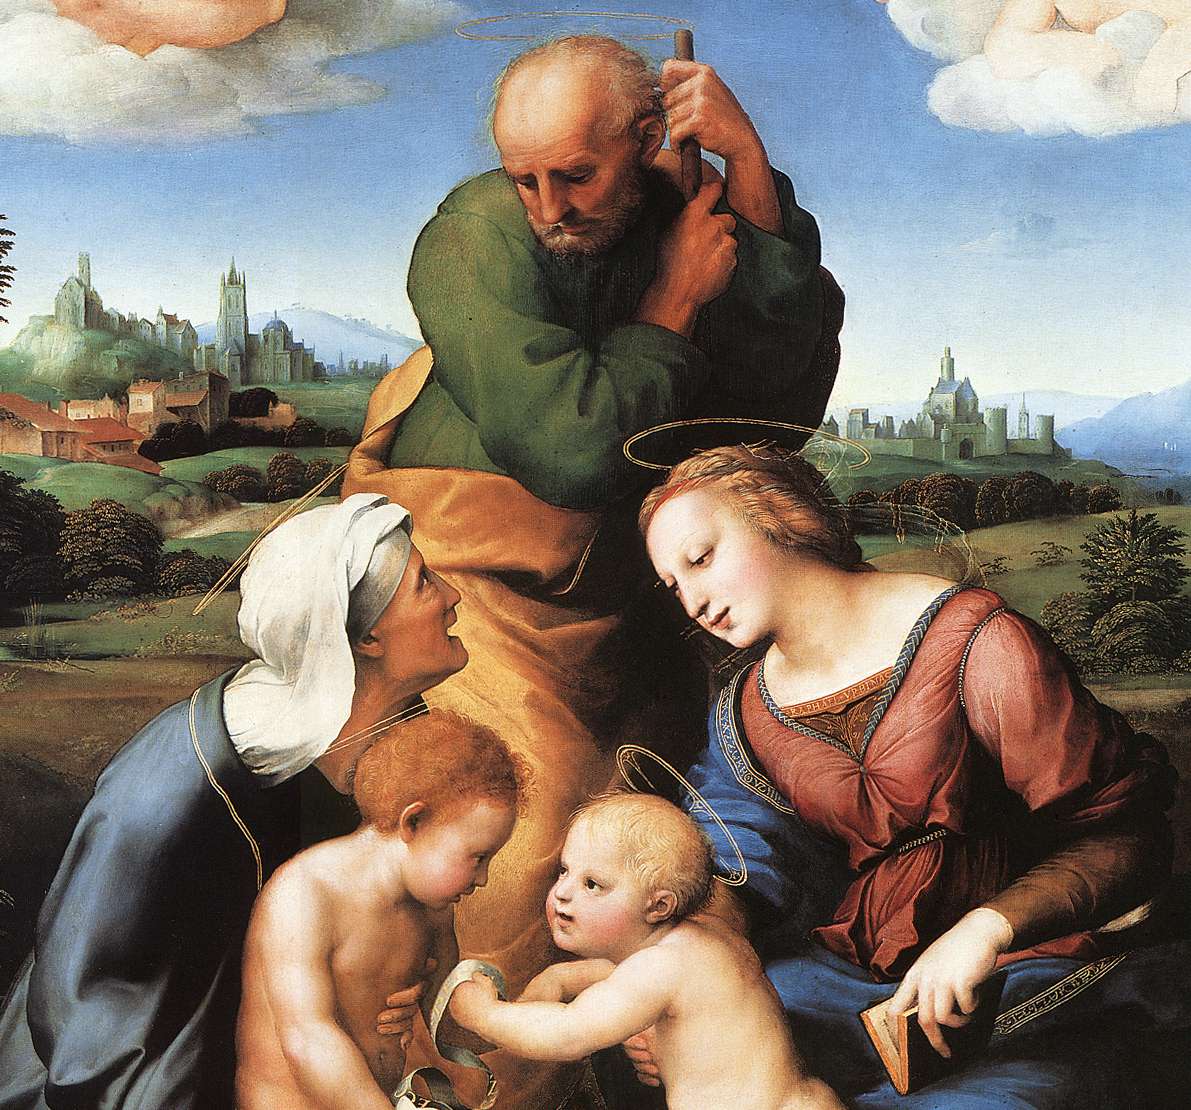
1. Follow in the footsteps of Rafael by mastering the Triangle compositional type he used in his Canigiani holy family painting. Use triangles to create powerful, dynamic compositions. Symmetrical triangles symbolise an equilibrium whereas uneven triangles can represent an object to overcome or an intensification. Remember, what story are you trying to tell?
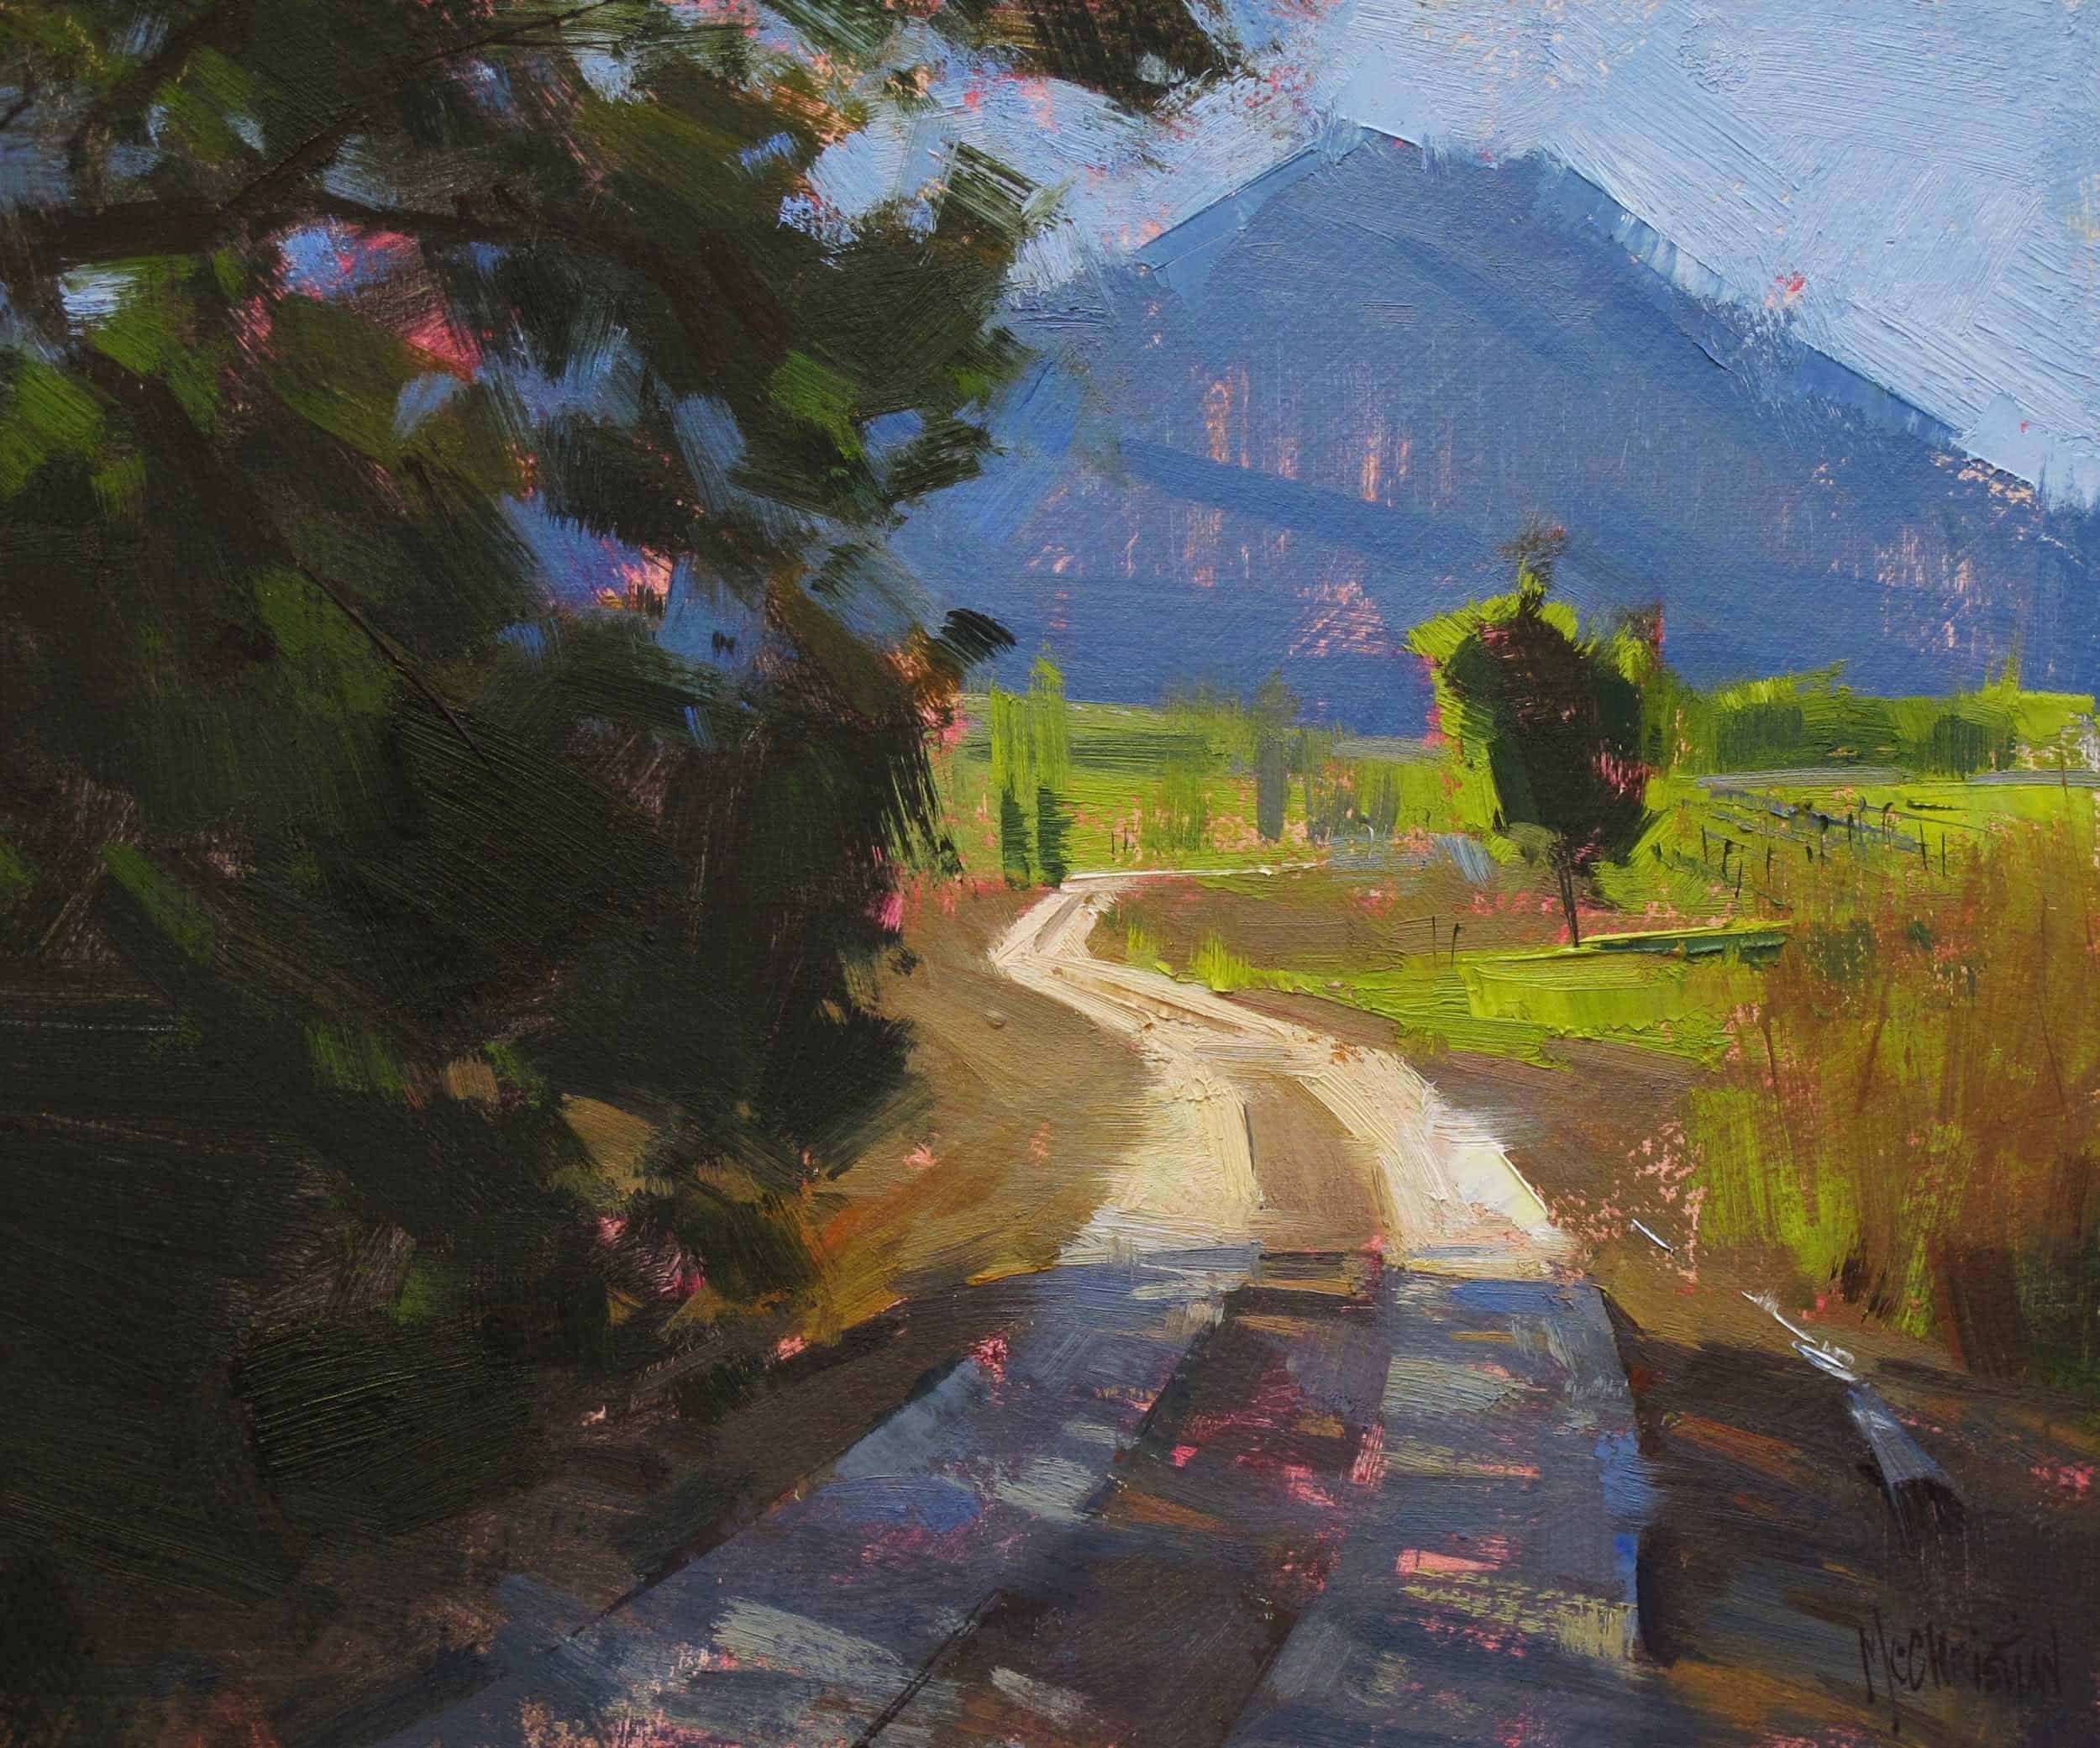
2. The S compositional type – this is a super simple one. Think of roads, rivers and paths!
The S generally serves one of two purposes. To guide the eye to the subject at the end of the S or to serve as the subject itself. A road leading up to a house or a river in a landscape scene.
I’ll save the best ones for Richard to explain to you!
Adding a grid
Using a grid on your screen whilst taking photos is great because it allows you to get great composition without having to crop your photos after. You can make sure that your subject is where the gridlines intersect or at least along the grid lines.
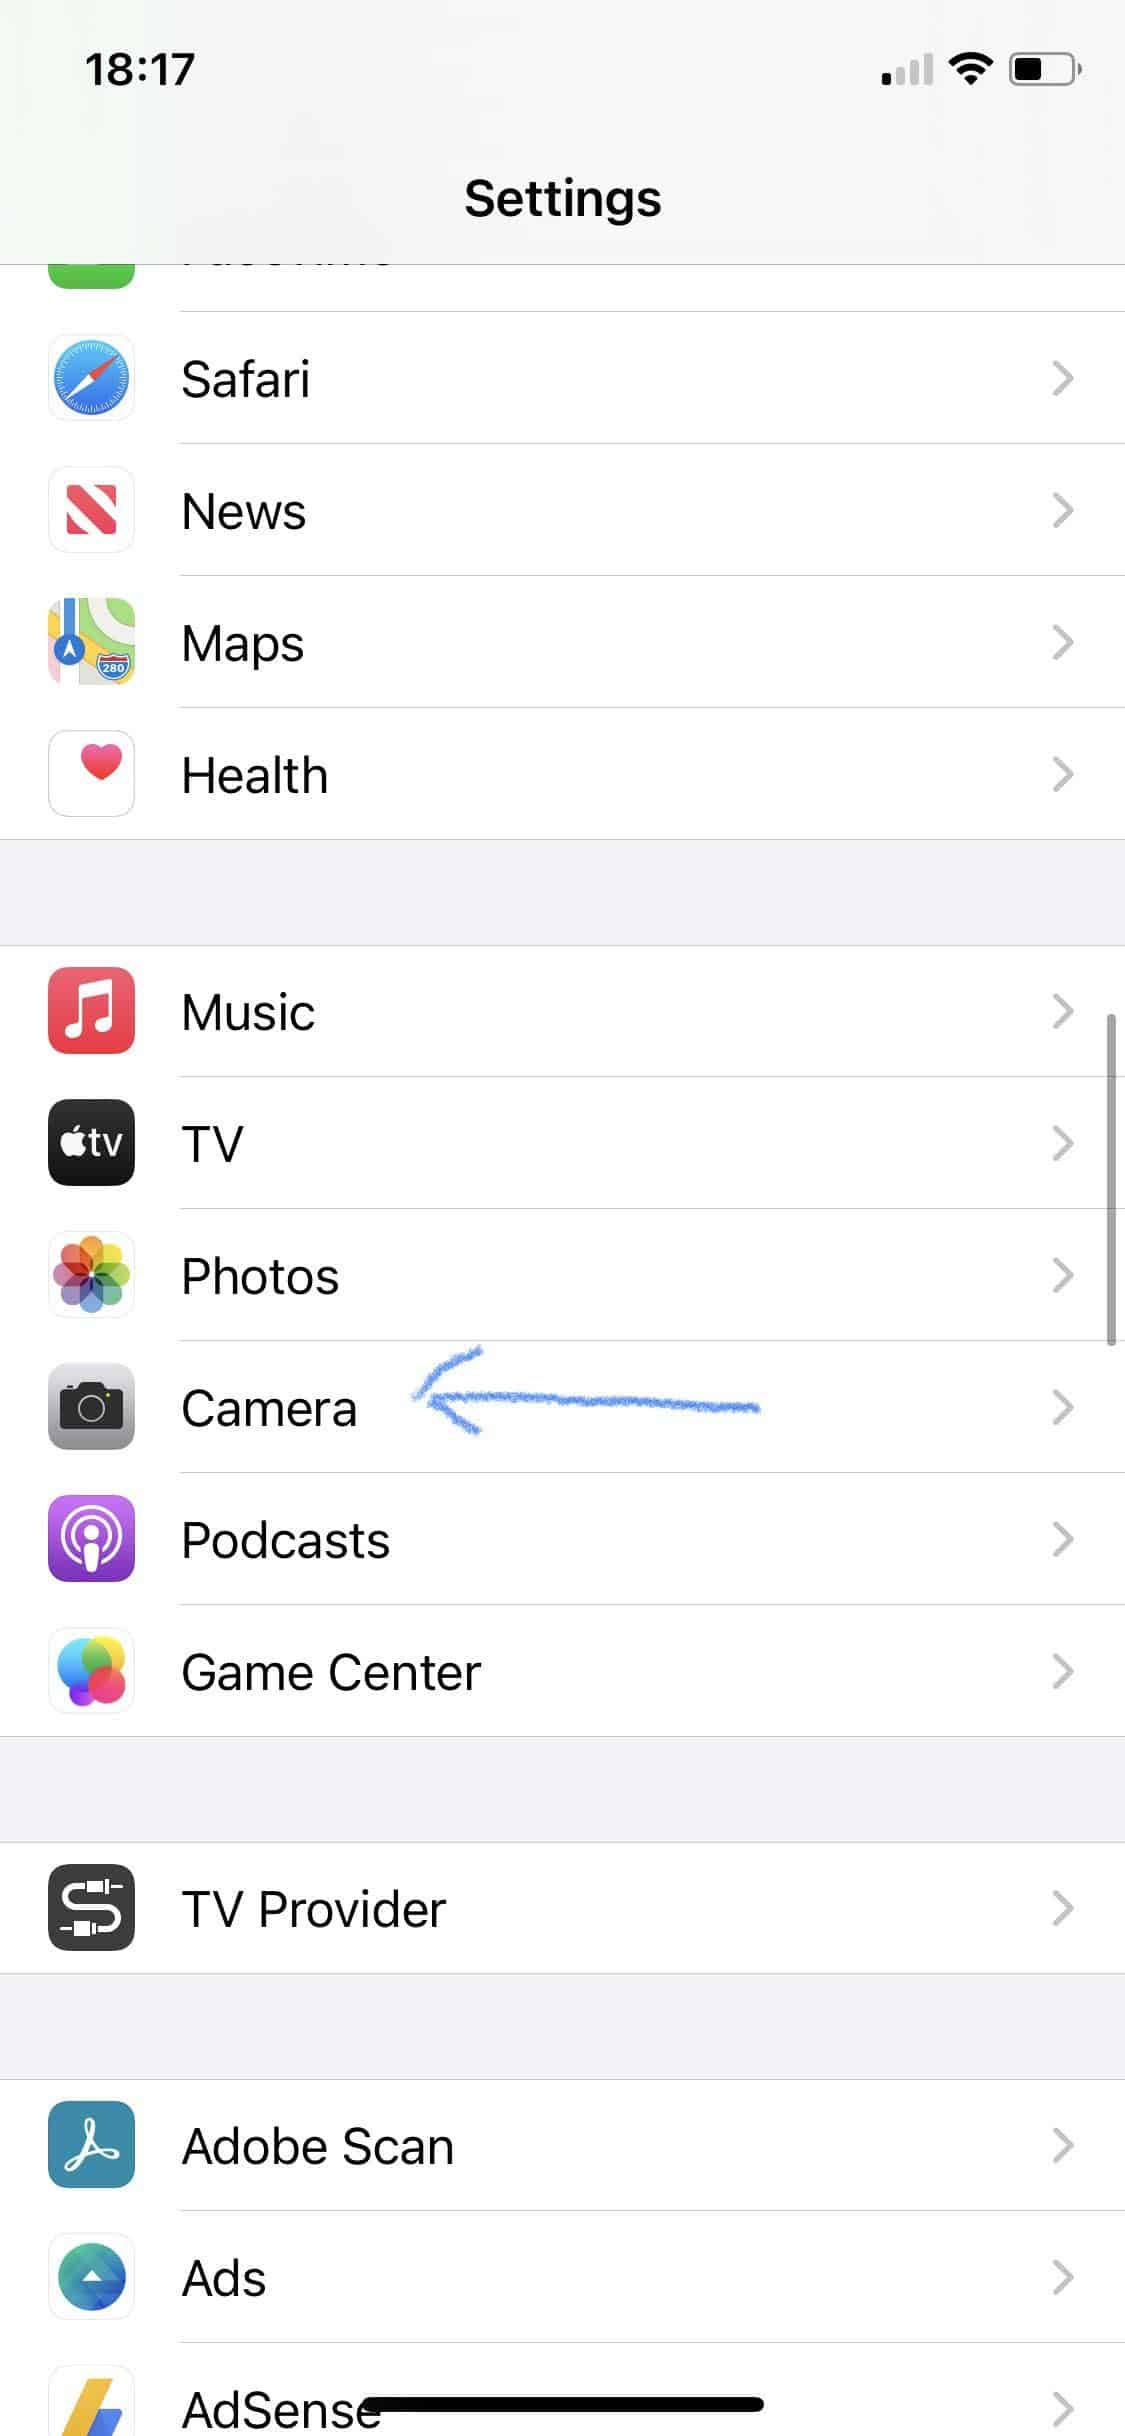
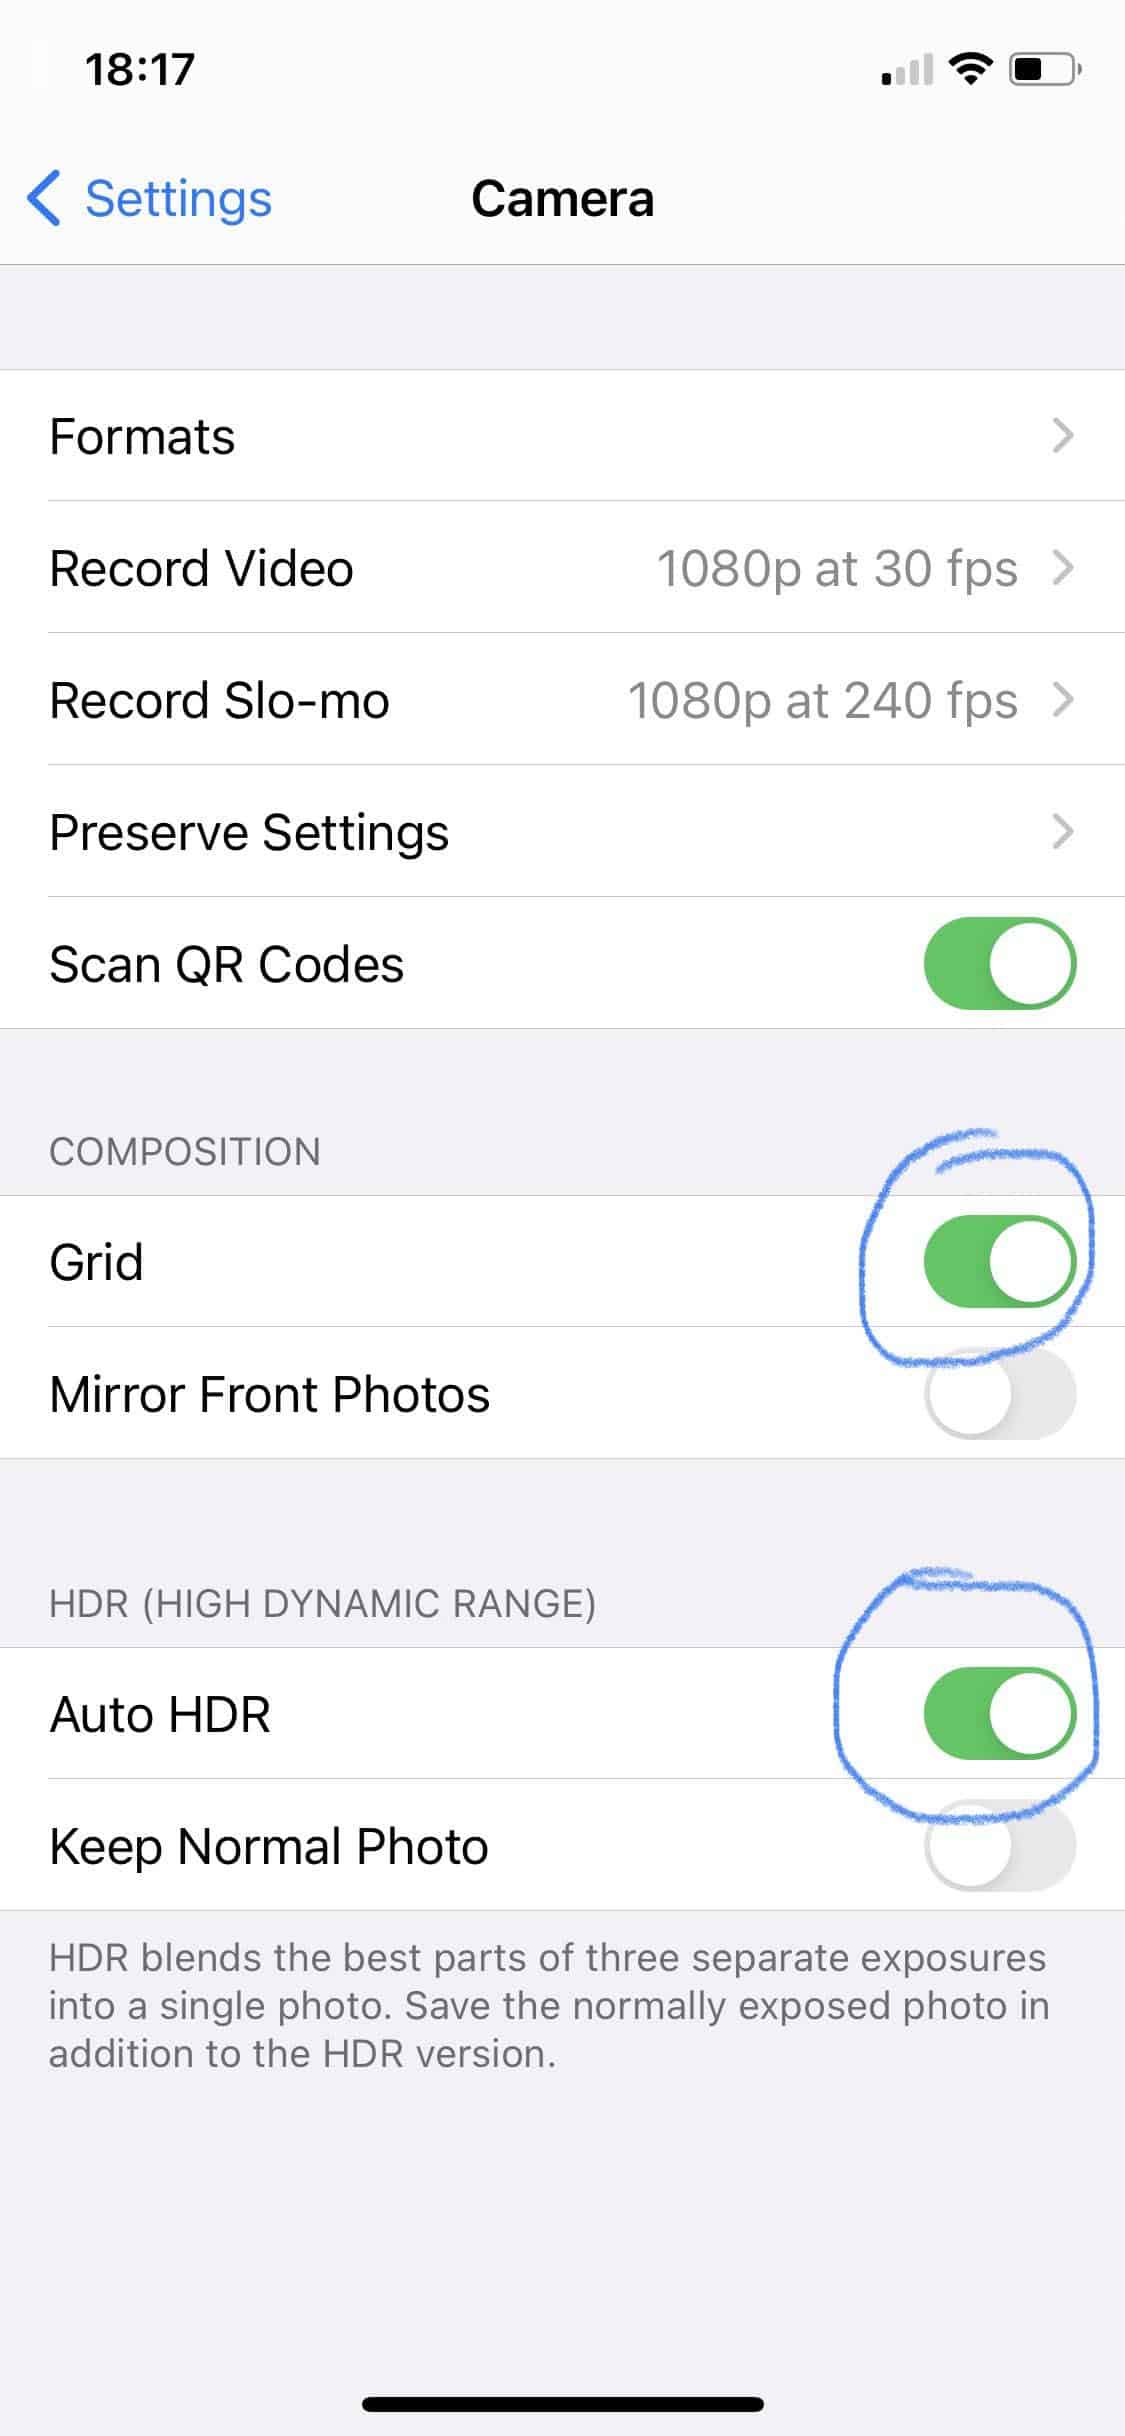
To get the grid on your screen, go to Settings > Camera. On the next screen, make sure that the settings are the same as the ones circled in the image below.
Make sure you keep your High Dynamic Range (HDR) on too, more about that later.
Adjusting and/or locking exposure
Whenever you take a photo, you want to keep as many details as possible to give you the most flexibility in case you decide that you want to edit your photos before painting from them (more on that later).
This means that you do not want to overexposure your photo and blow out all of the highlights so that they just look plain white with no details.
You also don’t want to underexposure your photos so that you can’t see any details in the shadows. Sometimes, that’s easy enough… Especially on overcast days. But, when you’re trying to take photos in the middle of a summer’s afternoon, the strong sunlight causes bright highlights and the walls of narrow streets can cause some pretty dark shadows. This is why you need to know how to correctly expose your photos.
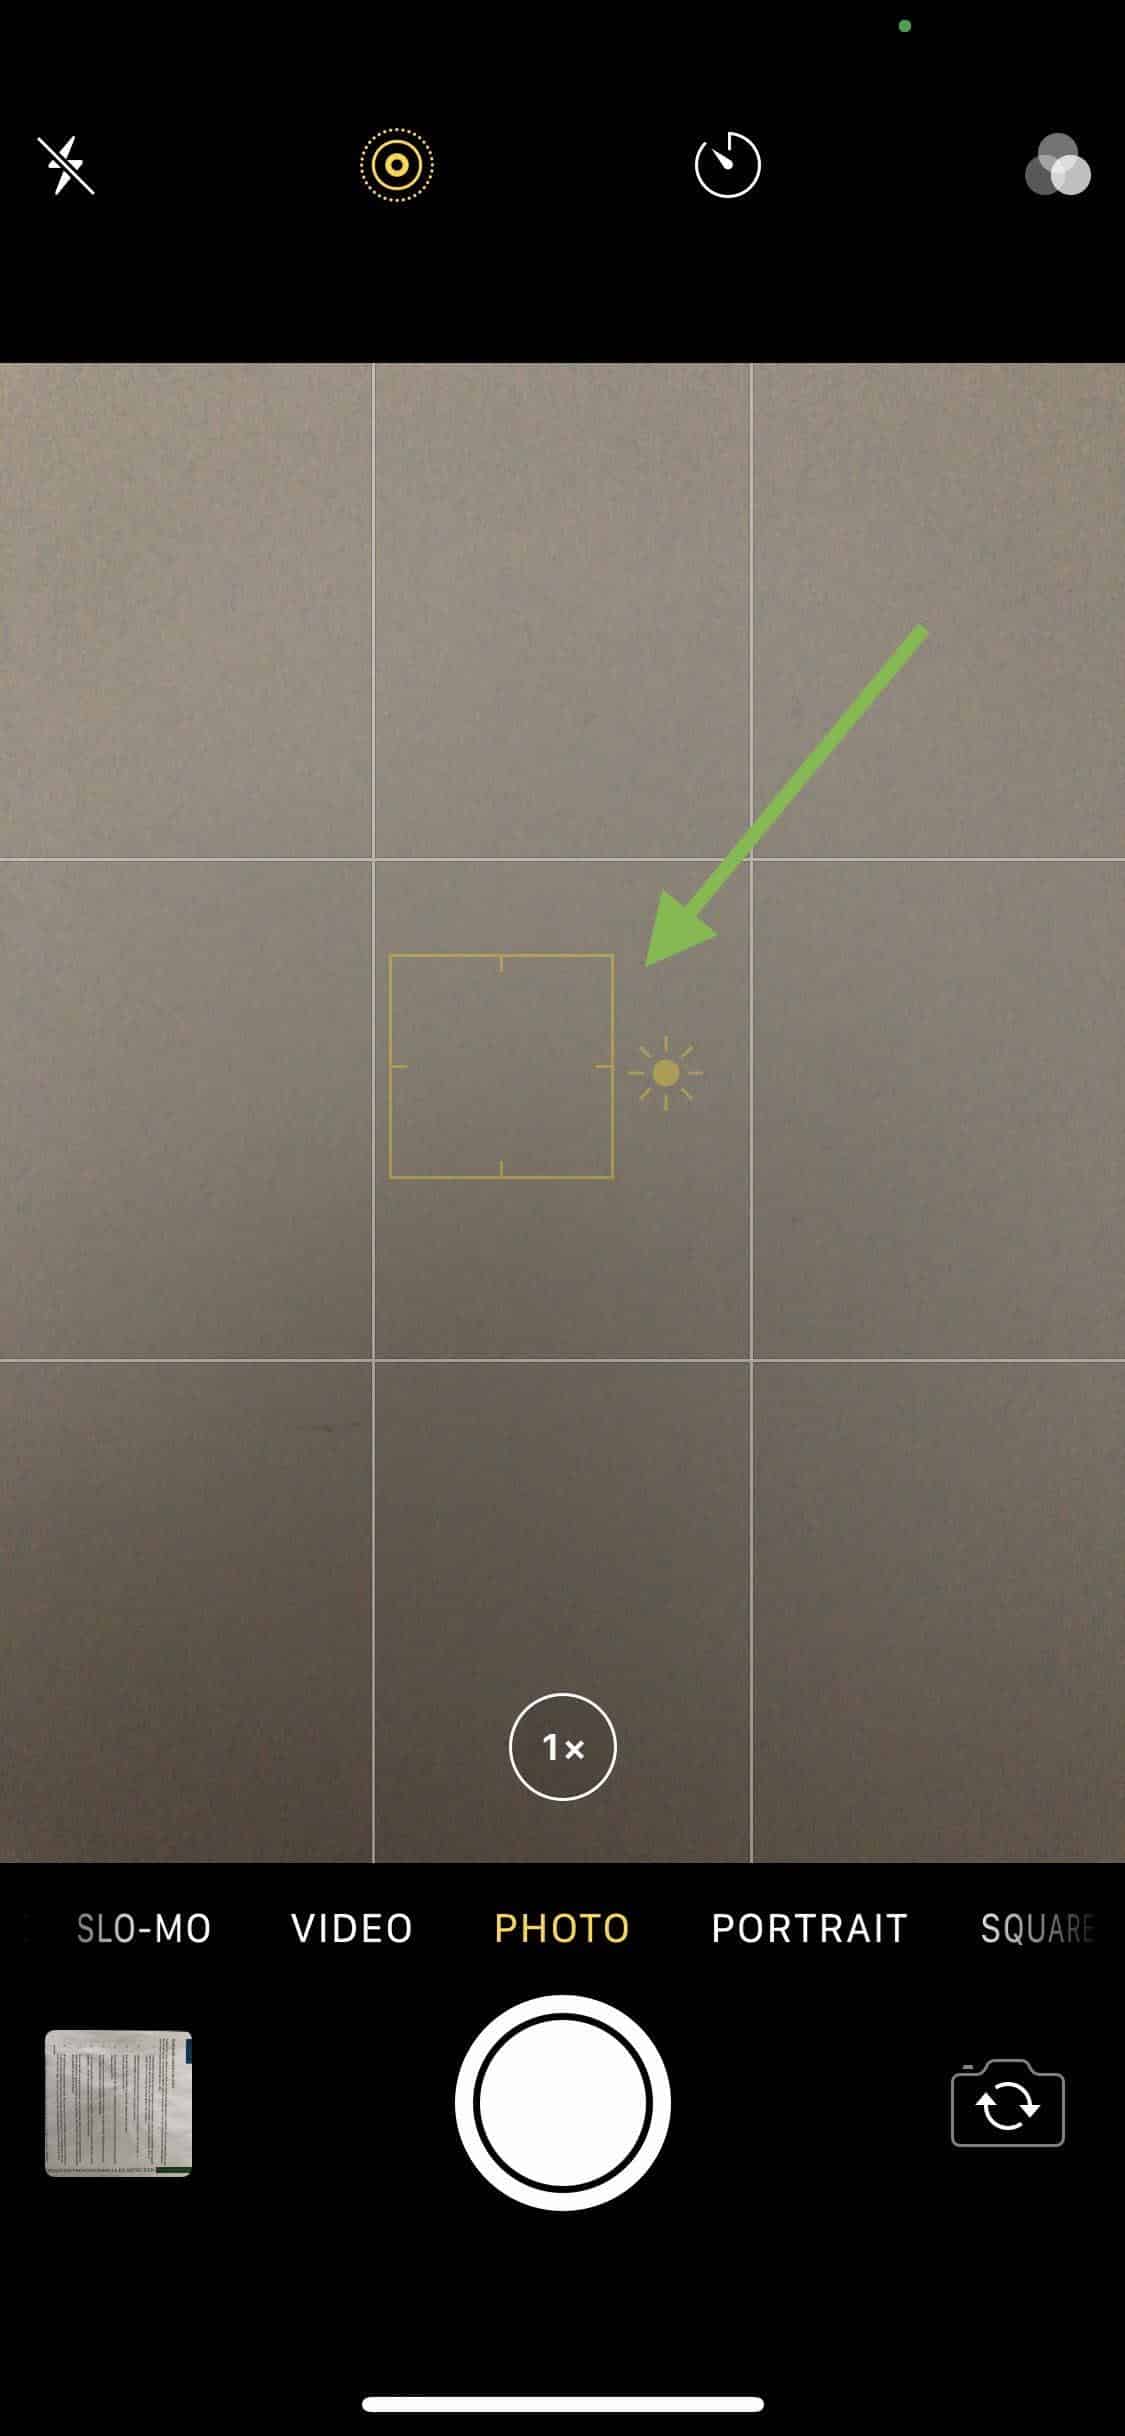
So… To adjust your exposure, you just need to open your camera app, tap on the screen and then drag your finger up to increase the exposure or down to decrease the exposure. Take your phone out now and test it… It’s super simple to get the hang of it.
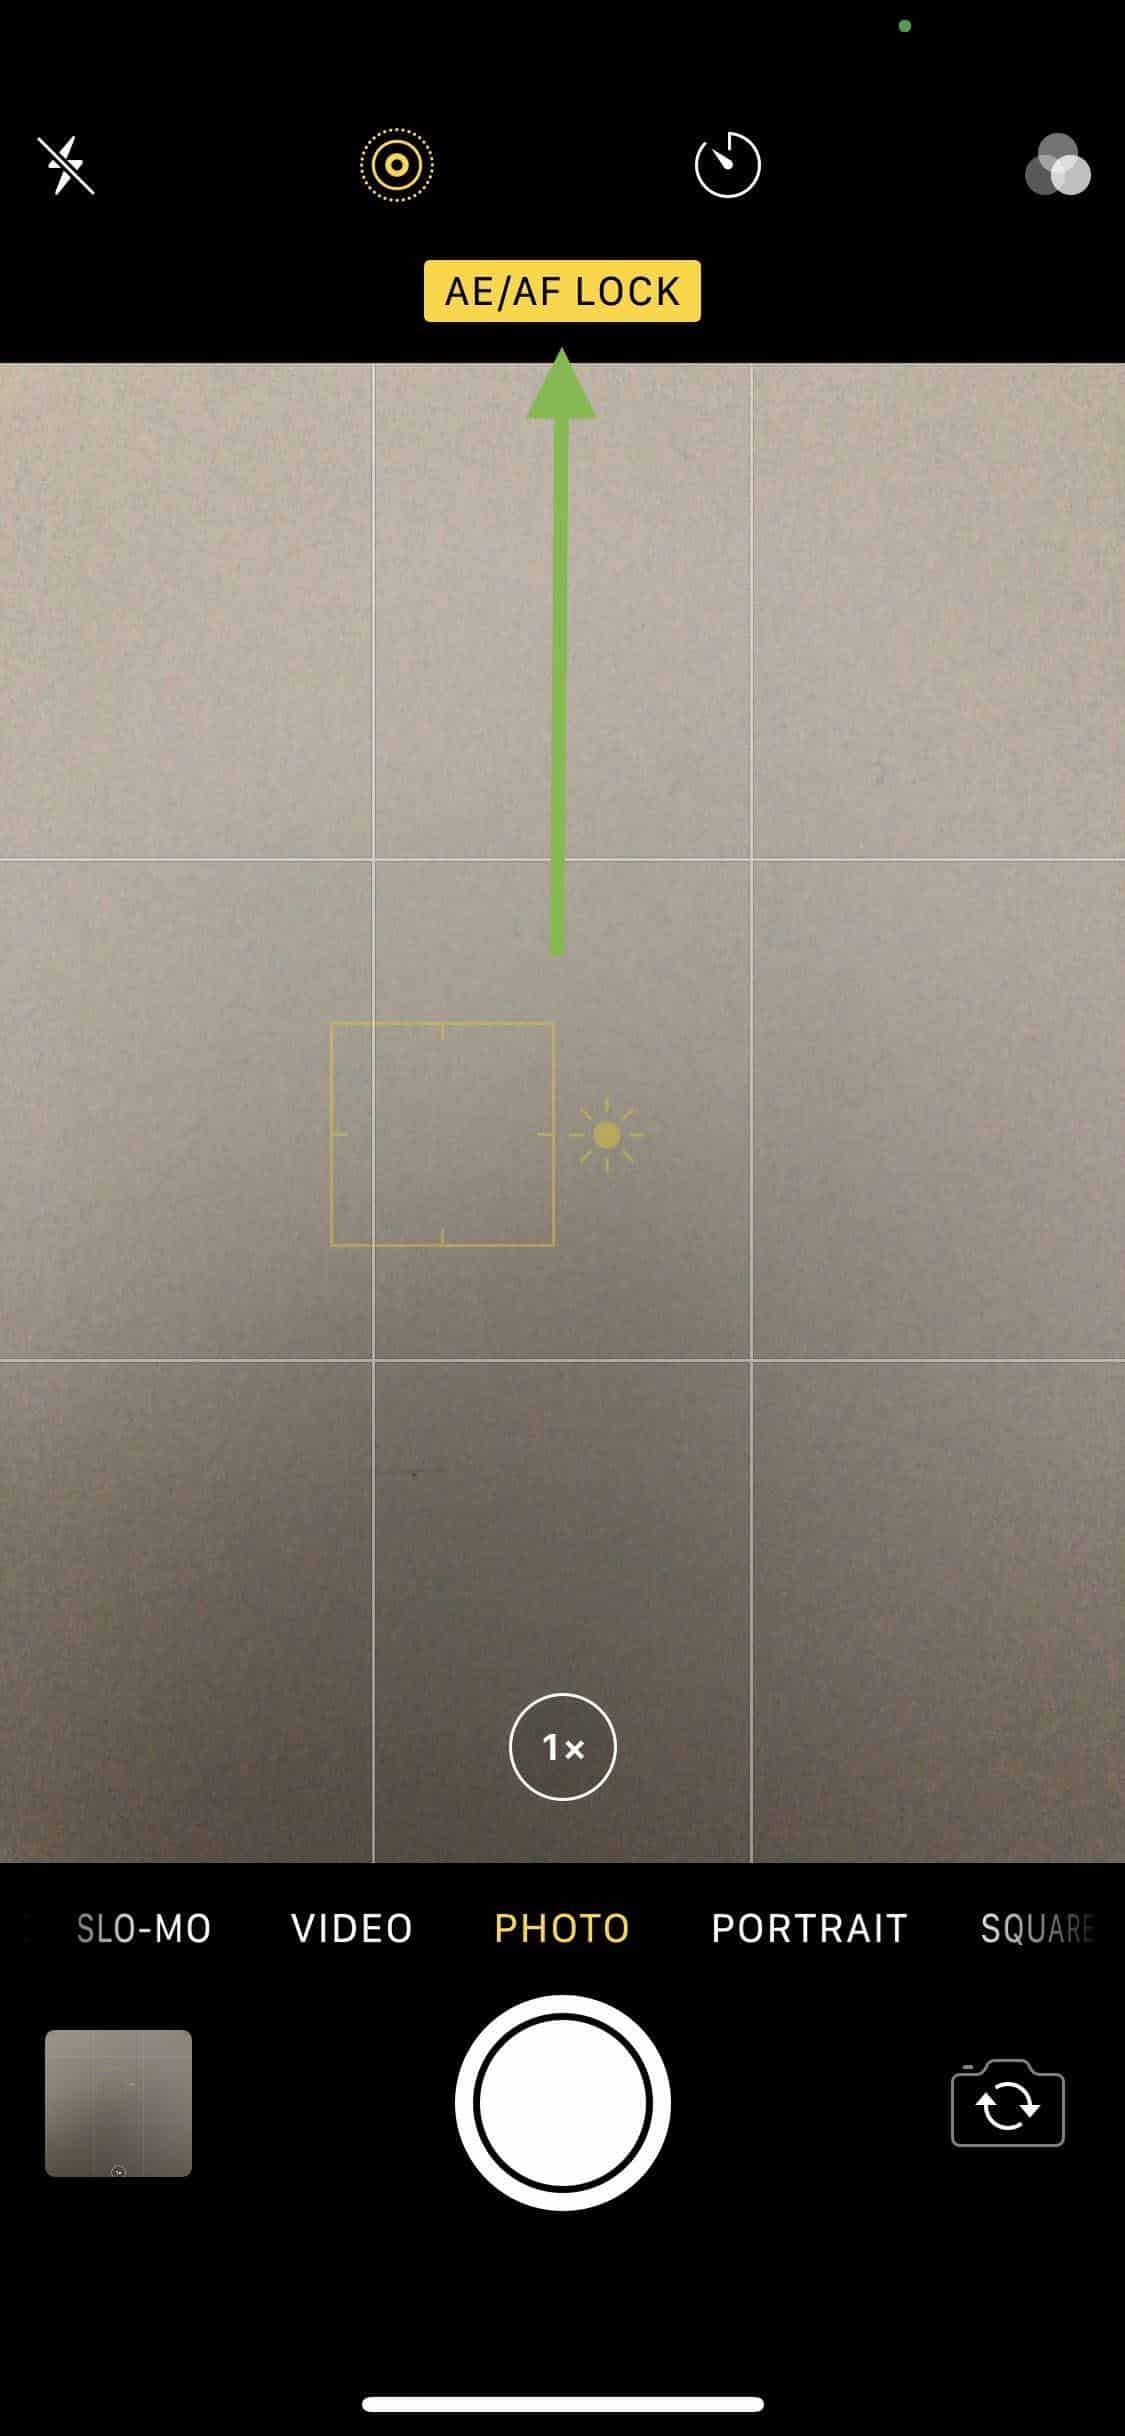
Once you’ve found the correct exposure, you can ‘tap and hold’ to ‘lock’ this exposure so that your phone doesn’t automatically try and adjust. See the image below.
What’s more, if you followed our advice about adding a grid, you’ll also have your High Dynamic Range (HDR) switched on.
So, if you take multiple photos of the same thing, your phone will automatically find the best highlights and the best shadows and combine them into the same photo, giving you much more detail!
This is really going to take your reference photos to the next level and give you so many opportunities to paint back in our studio or even when you’re at home.
Using the timer
You probably won’t use this feature much when you’re taking reference photos to paint from later, but sometimes it’s good to be able to take a photo of yourself without needing to ask a stranger to hold your phone and take the photo for you.
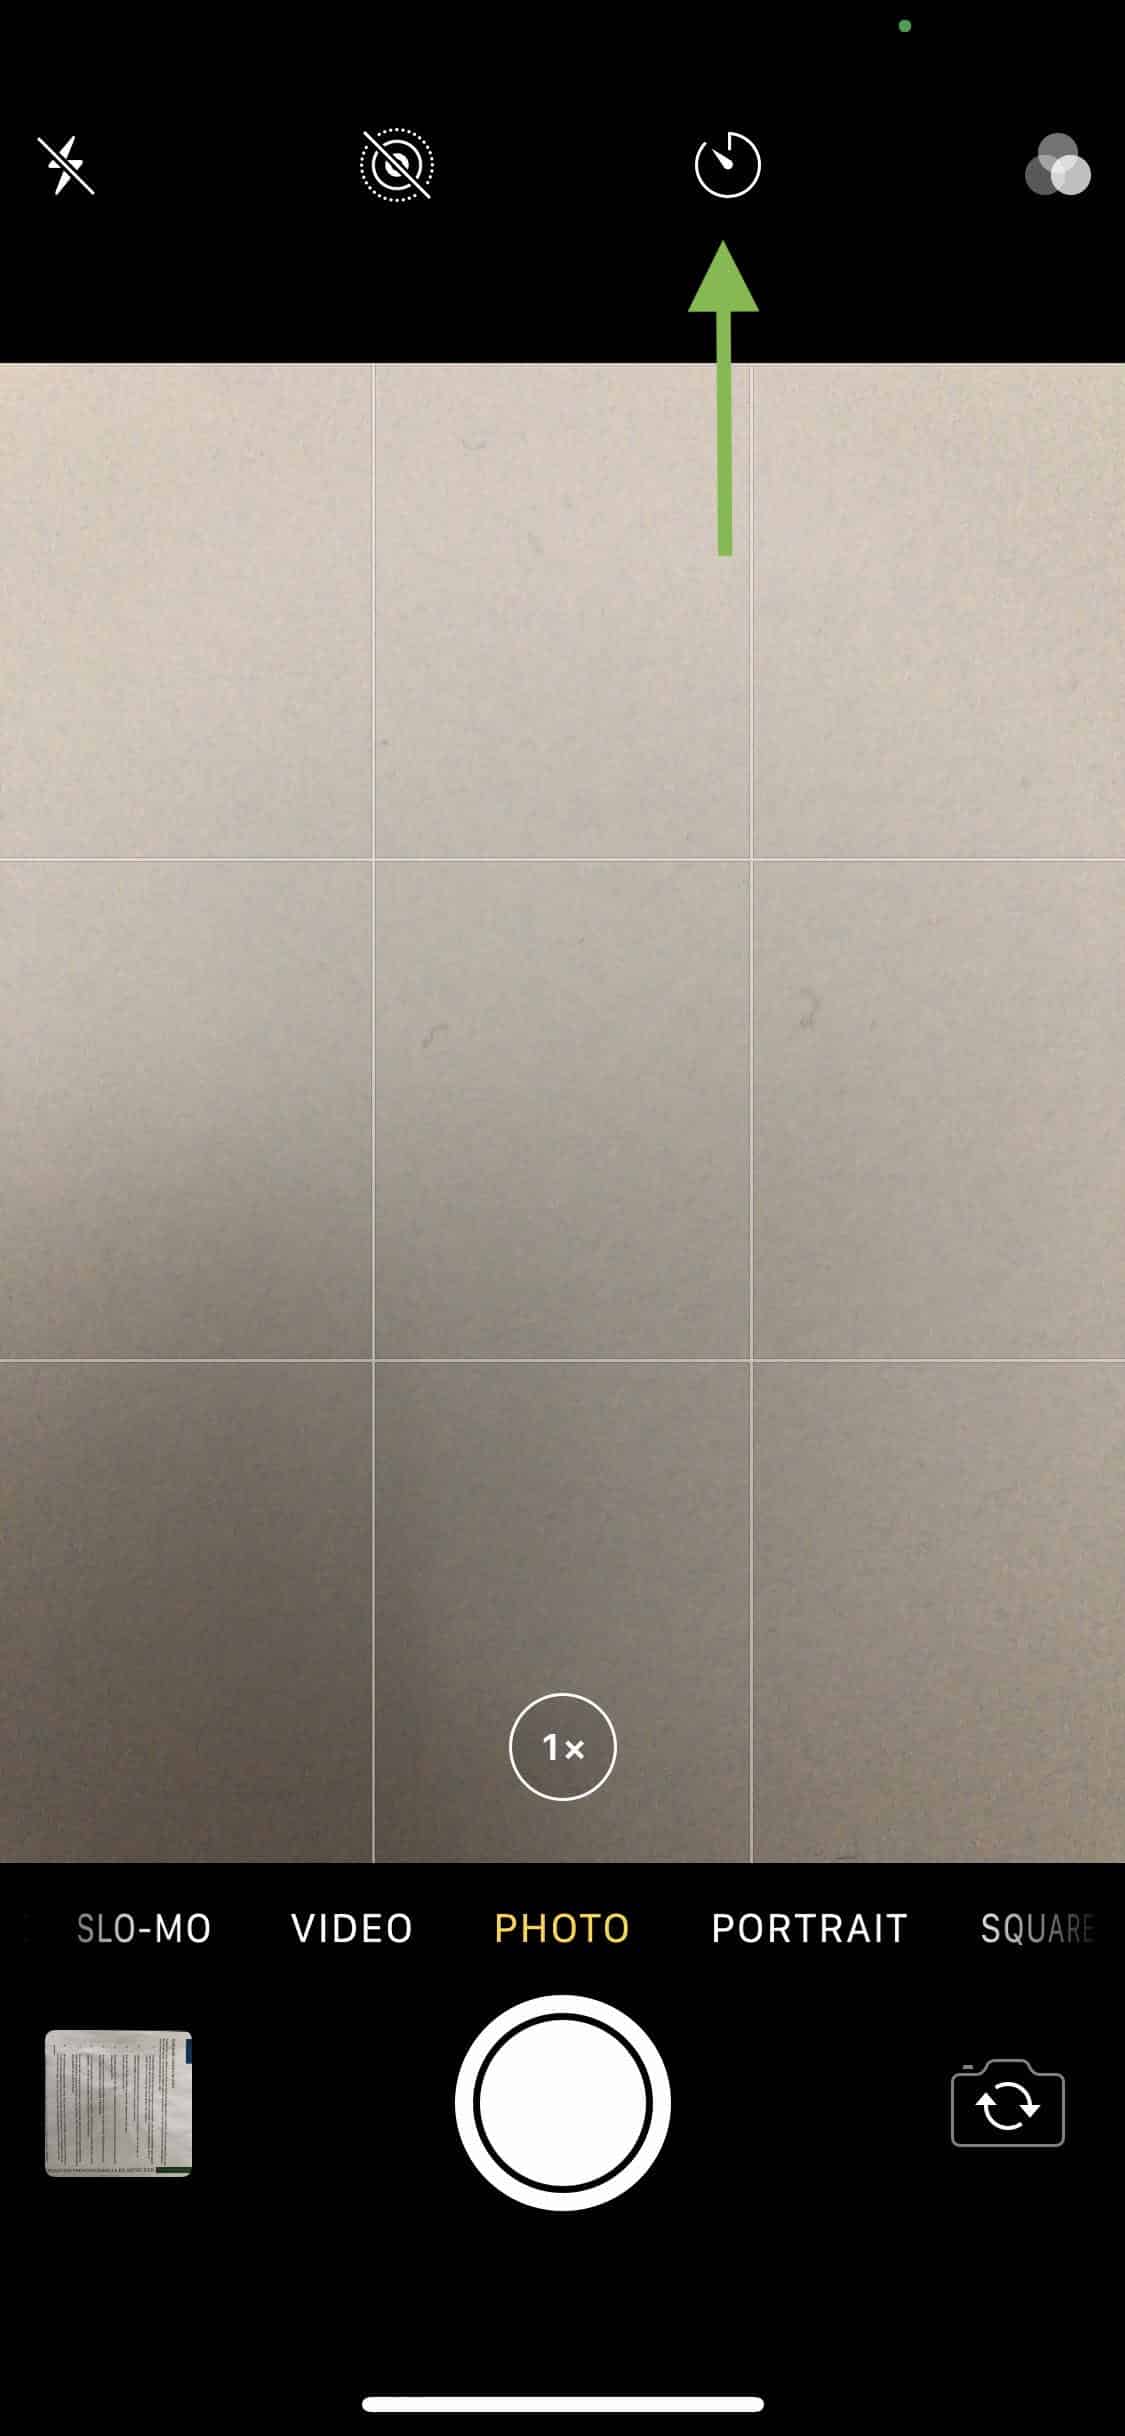
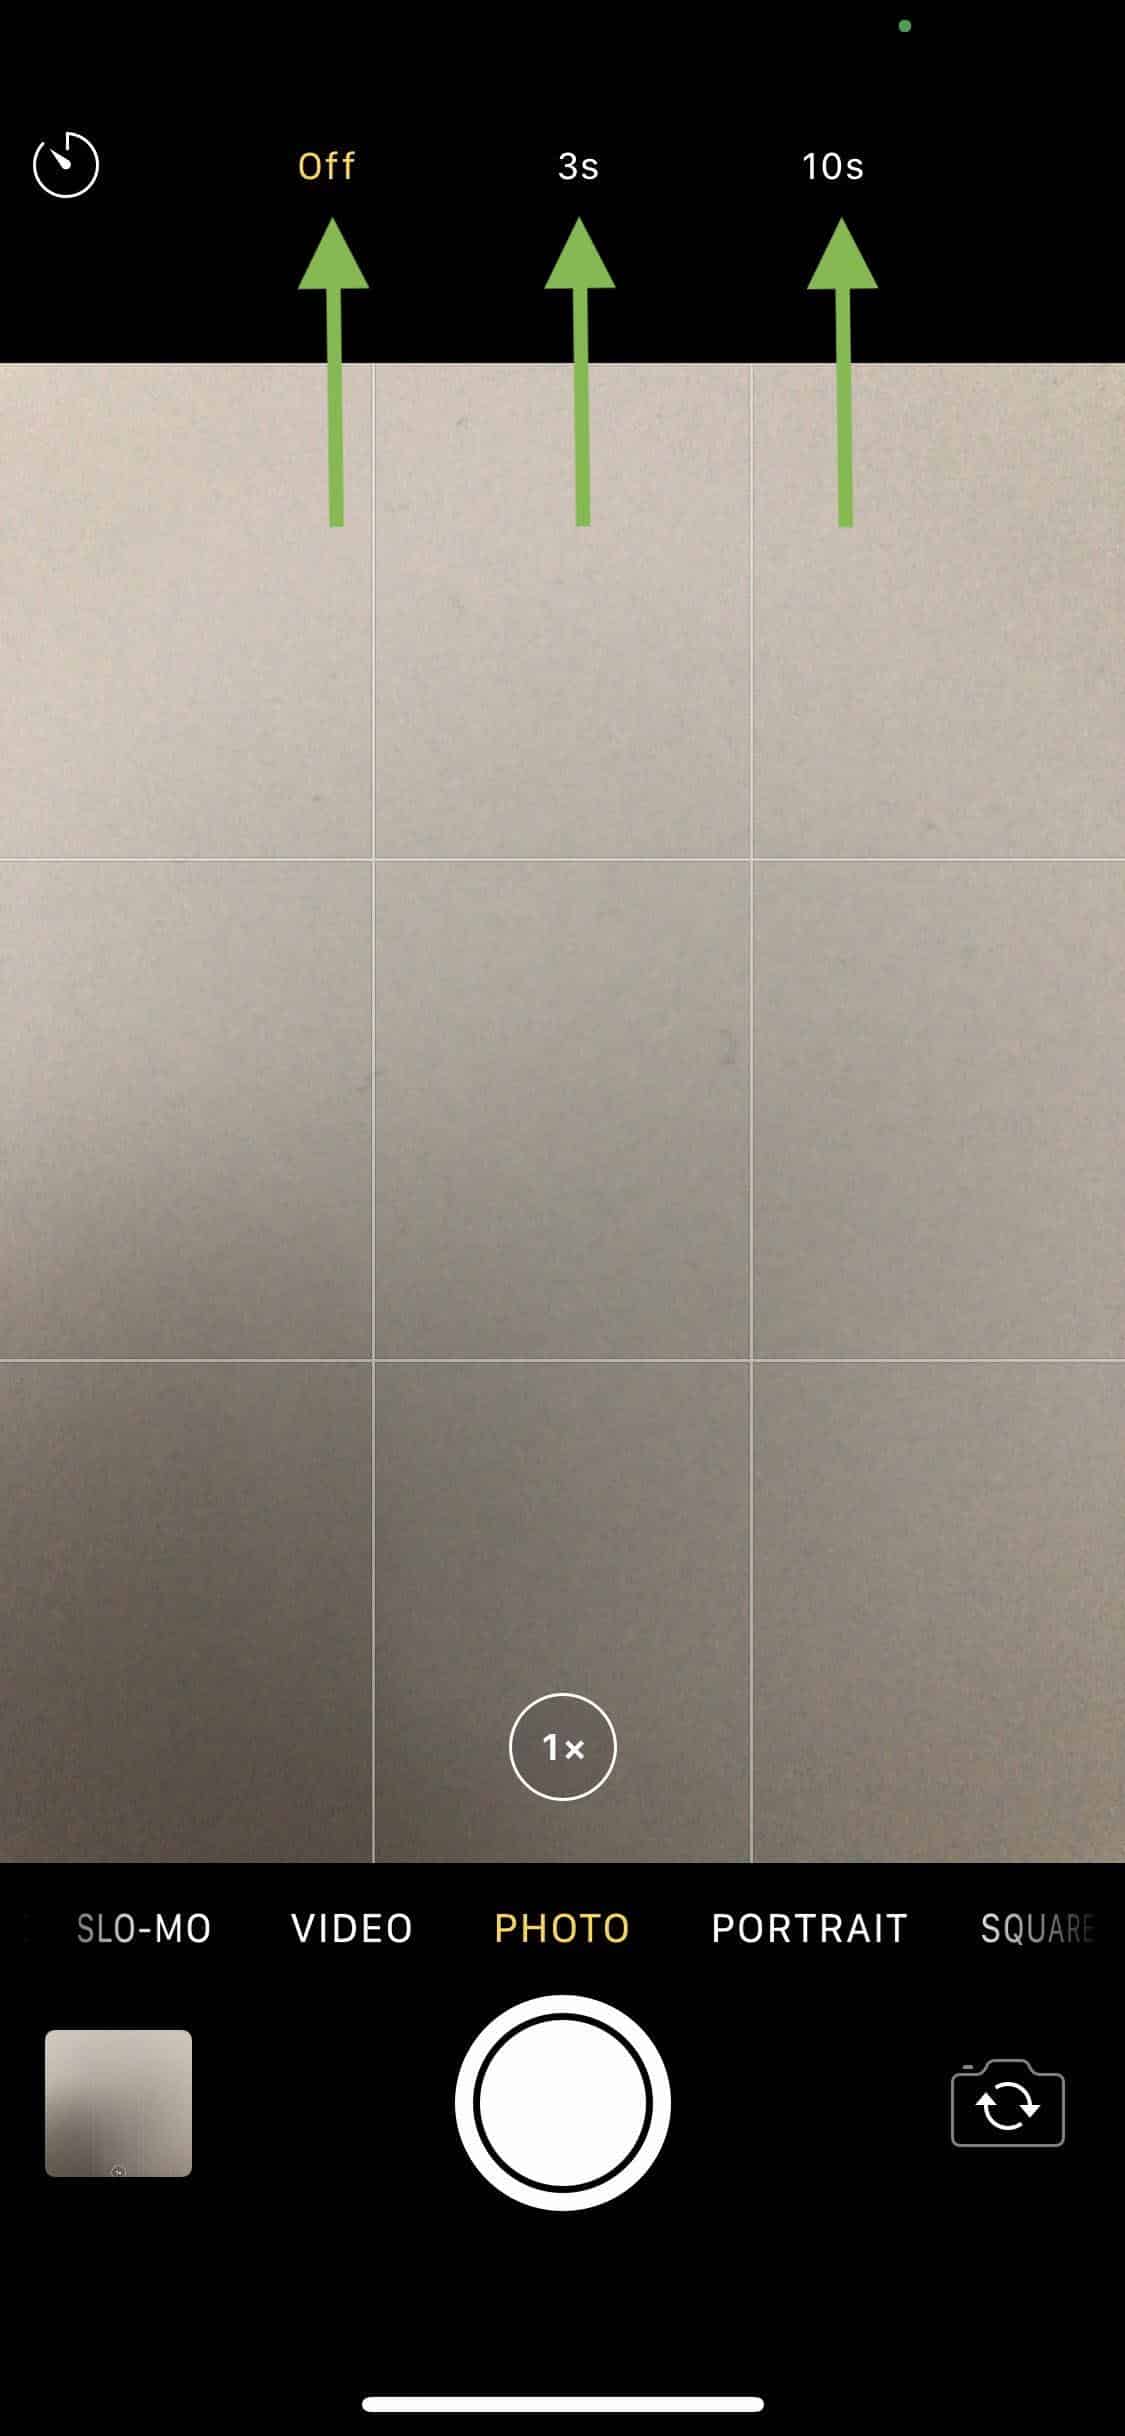
Open your camera app, click on the timer button (the second from the right at the top of your screen) and then choose if you want the timer to be off, 3, 10 second delay. Then, just click the button to take a photo and the countdown will start!
Portrait mode
This is a really cool feature to use if you want to take a photo of something like a pot of flowers or another similar subject that you want to make stand out from the rest of the image.
Using portrait mode is also simple. Open your camera app and click on ‘portrait’ at the bottom of the screen. Then just take a photo as you normally would.
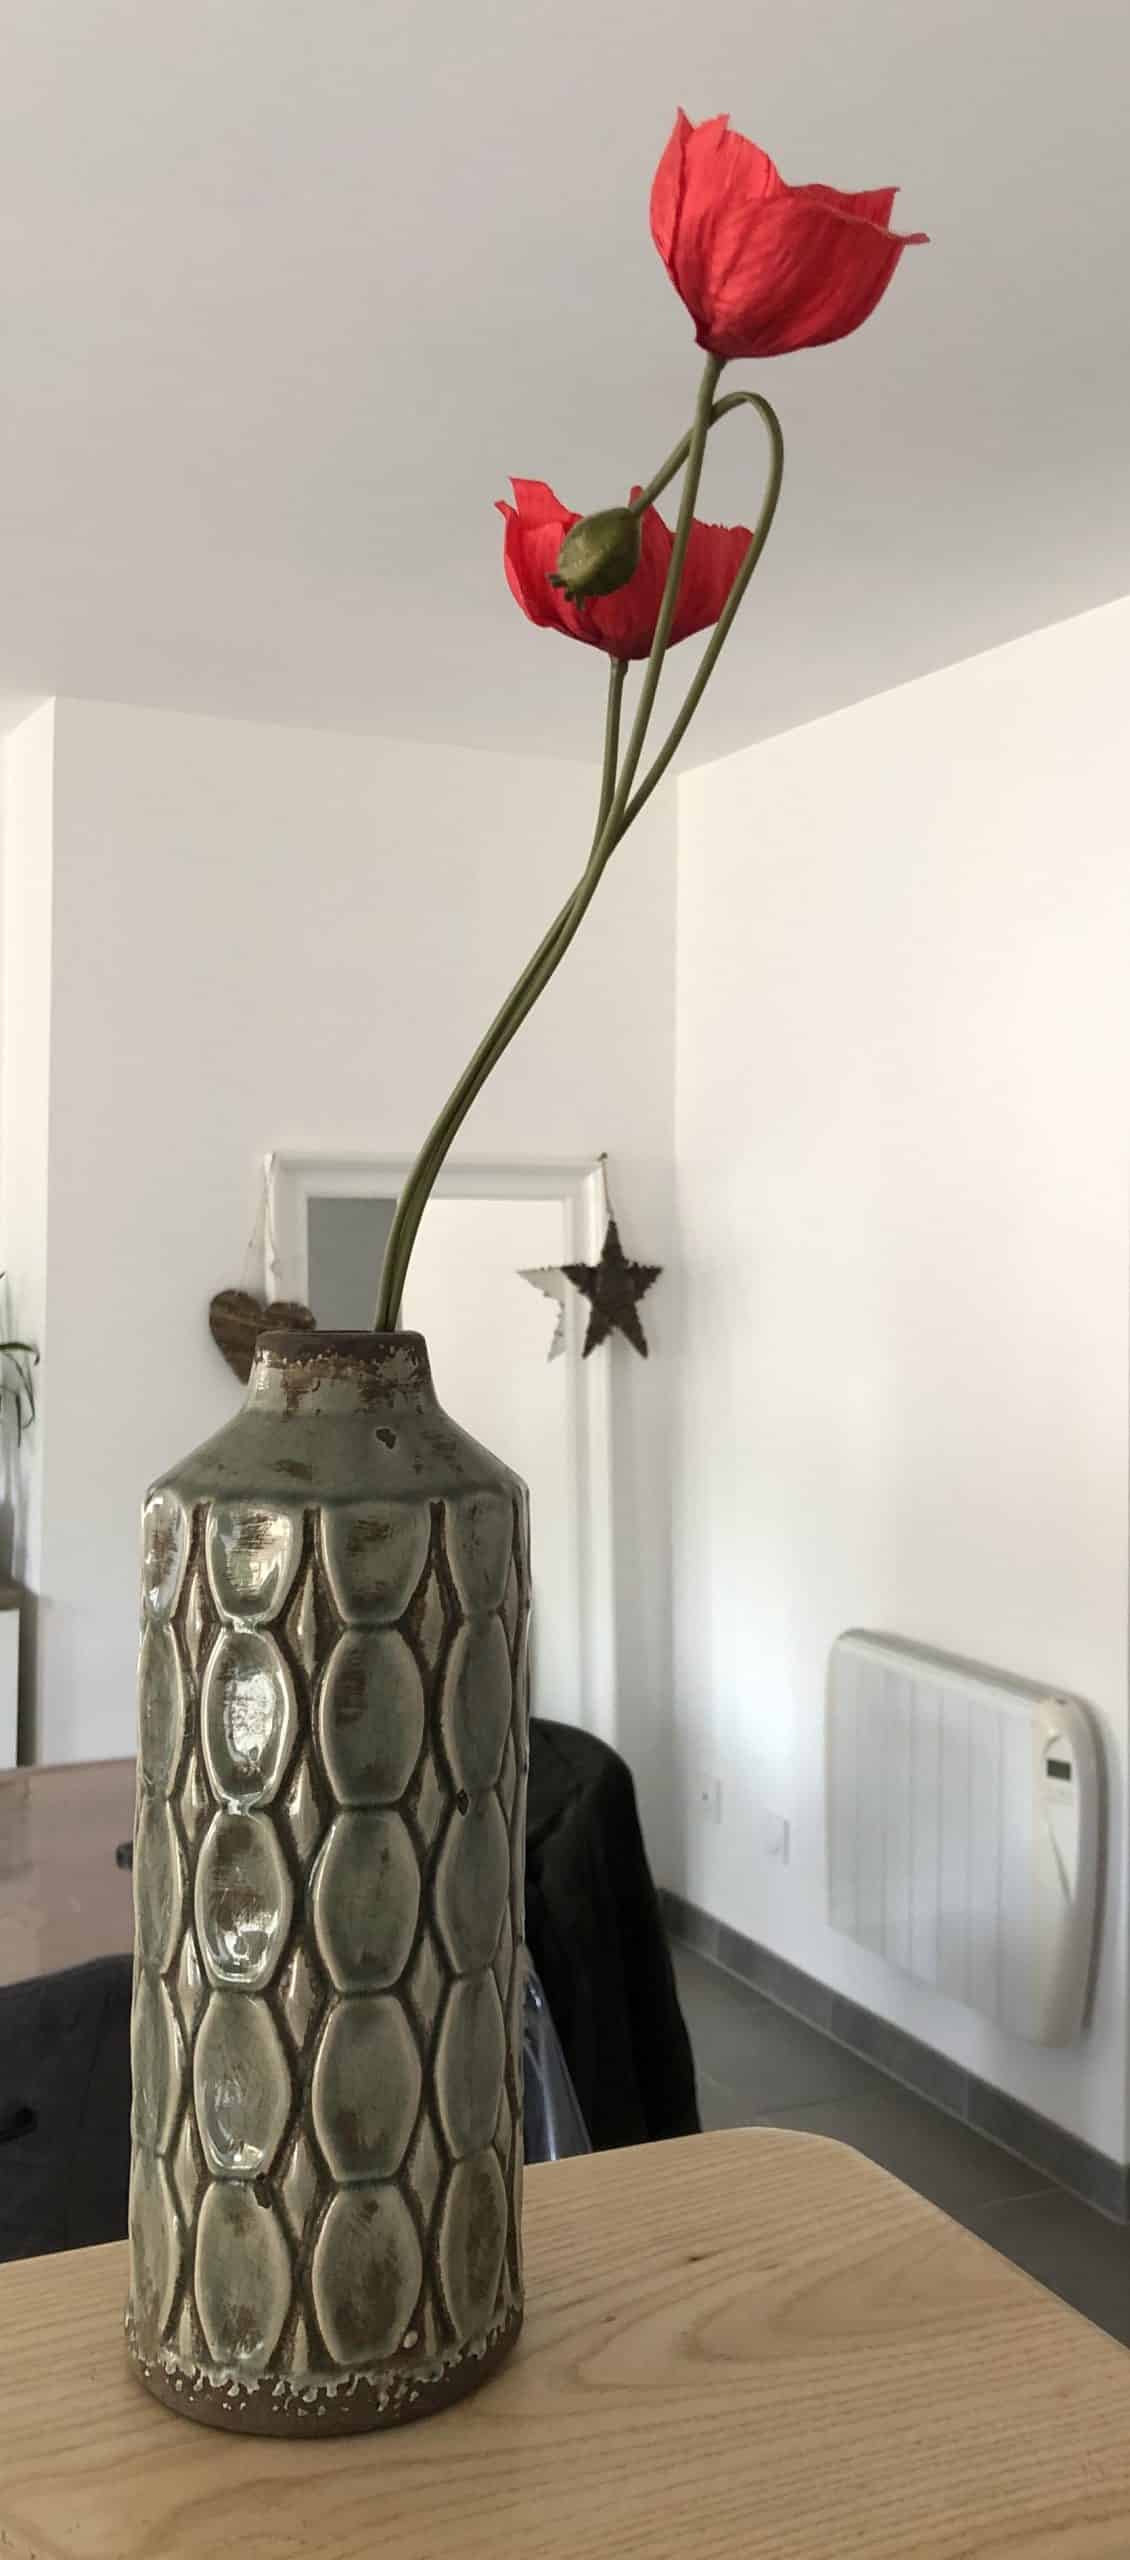
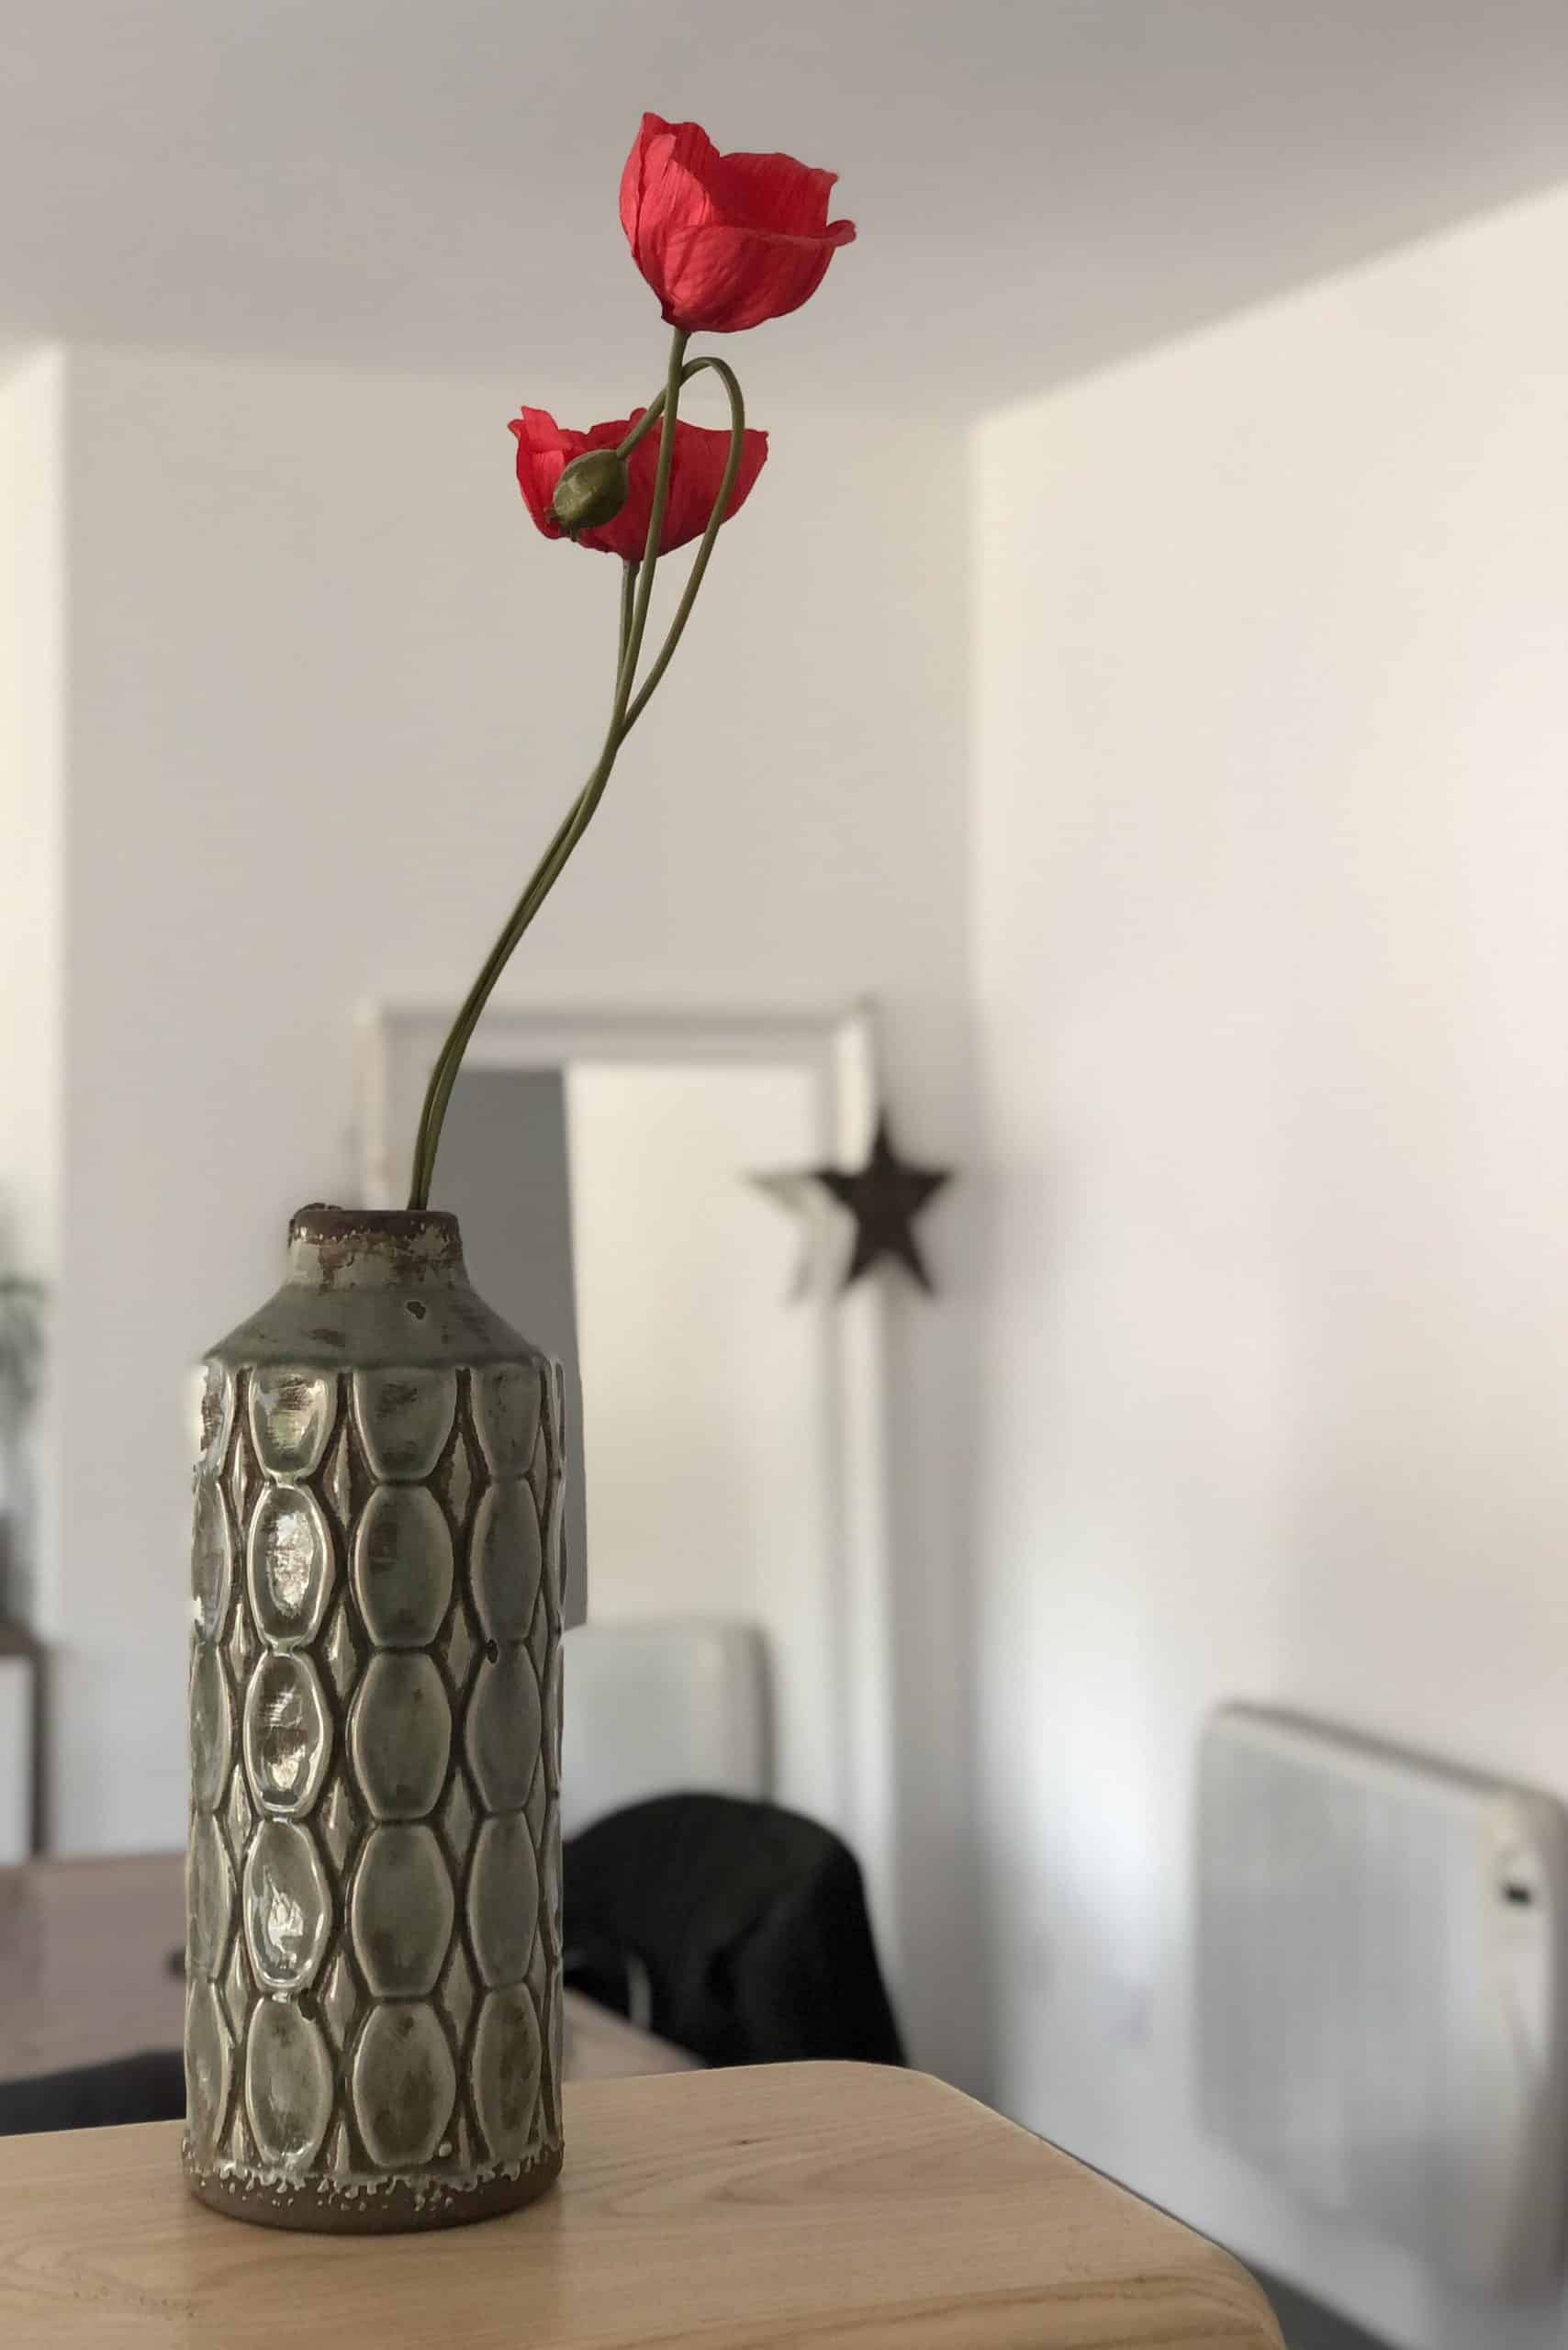
The images below show the same photo taken in normal mode and portrait mode. You can see that the photo on the right (portrait mode) has more background blur… This effect is even more pronounced when the background is further away. Give it a try.
Editing photos
Some of you will want to be able to make a few adjustments to your photo once you’ve taken it… Perhaps you need to straighten it up a little bit or you want to lose a bit of the detail in the image by adding a little filter makes your image much easier to work from if you have an impressionistic painting style.
I would strongly recommend the app called ‘Snapseed’. It’s really easy to use and it’s free. You can download it here.
Just download the app, click on ‘open’ and then select your photo. The adjustments are all pretty simple to make, but that’s another blog post for another time!
For the time being, I recently took a few reference photos from the region… If you want to start painting some, you can download them here.

Trackbacks/Pingbacks